Thursday 20 June 2013

My review on the book "Implementing Microsoft Dynamics AX 2012 with Sure Step"


An extensive, valuable addition to the Microsoft Sure Step Methodology A valuable asset on AX 2012 sure step methodology defined by Microsoft to ensure successful implementation of Microsoft Dynamics AX. The subject piece on ERP contains all the required contents of an ERP with extensive knowledge of Sure step client that shall prove a great help for the implementers / Project Managers of AX 2012.

The great work by the authors is surely going to add value to the Microsoft Partners who are striving for an excellence in implementing AX 2012 by following the sure steps defined by Microsoft in a single place. Implementers / Project Managers will find this book a guide to make an implementation a sure success without keeping tight collaboration among the team.

Upgrading to 2012 is not discussed so the consultants who are seeking information on upgrade guide, this book is not for them. This book have great material for Project Managers, who can understand how to execute a project successfully. If someone is seeking information on becoming a product specialist then this book is not for him, this is for implementers who have to plane and implement with the sequence & guidance given by Microsoft using the templates provided by Microsoft.

Some ISVs are also introduced in the book for reference. Description on available templates for scope of work, architecture assessment, project activities, kick offs is available to fully work with sure step client. 

The book have great information on infrastructure planning e.g. choosing technology, servers. Strategies of test, pre-live and live environment are also discussed. Good examples of real word are also included in the book to visualize real environment. Information on preparation & Requirements for installation of AX are also enlisted precisely.

Disaster recovery is also discussed in detail. A great real world template of Hardware requirement for 250 users is prepared which will give a good understanding to the infrastructure planners as a quick reference.

A comprehensive information on project execution requirement e.g. finalization of project charter, project plane, kick offs, FRD, Fit Gap is also detailed in chapter 5 of the book. Best practice questionnaire is described in the book which helps to map process with best practices. Great material is available on project team training. A great budget template is included for project managers to manage budget, invoices and variances.

Details on Work Breakdown structure and decision accelerator are also detailed well but Accelerated Proof of Concept (POC) with CRM Online – is not detailed in this book so people seeking information on POC with CRM will not find information in this book.

System wide configurations are also discussed well, following points of diagnostics are also discussed:
1.      Requirements and Process Review
2.      Fit Gap and Solutions Blueprint
3.      Architecture Assessment
4.      Scoping Assessment

Following sections are discussed for project implementation success, which is helpful to plane a successful implementation
1. Executive Summary
2. Project Definition and Objectives
3. Key Deliverables
4. Success Criteria
5. Project Approach
6. Project Scope
7. Scope Change Process
8. Risks
9. Constraints
10. Assumptions

A complete chapter on infrastructure planning is included for hardware & infrastructure planning but this book do not focus on infrastructure sizing metrics or specific implementation designs. Instead, it will help you decide who to involve, and what needs to be considered in the planning processes by highlighting the key technological areas to look at when designing an infrastructure to support AX.
In this book reader can find following information about infrastructure planning:

• When and how you should start planning infrastructure
• How to get the most out of your team by choosing people with the correct level of skill and experience for your project
• The key technologies and roles you must consider in order to achieve a successful AX implementation

The chapter Business Requirements Analysis also adds value to reader as the author given a road map of business requirements analysis, which are following:

• Overlap with the Diagnostic phase
• Process or Functional Analysis
• Best practices
• Project team training
• Rebudgeting the program

The preferred process described by the author looks like, it will lead towards less customization list.

In the book user will find material on budgeting and rebudgeting after Fit Gap analysis. A good template is available on packet website which includes budgeted vs actual for current and forecasting for better understanding of budget changes during guess time during diagnosis and analysis phase.

The chapter on AX Setup have given details on the decisions to take before setting up AX for demo and live. System-wide configuration section give good details on use of configuration keys and recommends to enable configuration keys before go live if a key is not yet required but company have future plane to use the functionality. Especially about TAPI, its going to be deprecated in coming days so its recommended to keep it in mind before offering TAPI solution to your clients. 
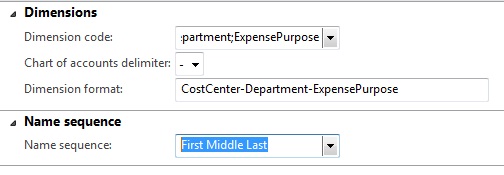
Dimensions are discussed in detail in this book, which helps planning dimensions as this is also one of the most import part of the system configuration so I would recommend to read this section for sure.


Integration section includes good information on taking decisions for integrations, following points are discussed regarding integration:

• Identifying integration
• Accessing integration
• Technologies
• Planning
• Testing

Material on standard AX features is good, as the author have given details on having to understand the standard AX features before making decisions on developments. The main topics discussed include:

• Workflow
• Advanced filters
• Cues
• Alerts
• Personalization

A chapter on Designing and Developing the Solution is included to get help in taking decisions which helps making design and development a success, following is covered

• Understanding the impact of change
• Planning the development
• Practical advice for the Development phase
• Managing environments


A chapter on Reports, Document Layouts, and Business Intelligence is included which examine:
• The three main topics of system output: Reports, Document layouts, and Business Intelligence
• The differences between them in their development and their use • Where the activities fit within the project processes, and some of the key constraints and prerequisites that are quite often overlooked until they cause a problem
• Reports, Document layouts, and Business Intelligence in the Delivery phase


Deployment Phase is discussed and covered following:
The topics covered in this chapter are:
• Getting ready to deploy
• End user training and user acceptance testing
• Training best practices
• Testing

A good example on task completion is quoted in this section, which is helpful for the manager to see where we are, and weather we are ahead of the tasks or behind the schedule and need acceleration

Project Governance and Quality Assurance chapter details following topics with good material:
 • Project Governance and Delivery Review
• Quality Assurance.
This chapter is worth reading as quality assurance is the main part of project implementation, as customer always want 100% quality on project implementation, so this chapter adds value to the readers project quality assurance information. Cobb's Paradox analysis tool information also adds good value to the reader.

The chapter on Operation Phase

In this chapter operation phase is discussed and information on handing over the project to customer & support and disengaging the consultants is detailed in a precise manner, which adds value to readers information on operation phase success.

The topics covered in this chapter include:

• Project Planning
• Transitioning the Solution to Support
• Future phases

Saturday 15 December 2012

Microsoft Dynamics AX 2012 Data Migration Framework Support Q & A

Purpose: Purpose of this document is to enlist the problems and their resolution of common problems faced by different users related to Data Migration Framework and Excel Add-In for Microsoft Dynamics AX 2012.


Problem: How to Update/Change Search Name after upload of Items Master Data

 
Note: Microsoft has launched new enhanced framework named "Microsoft Dynamics AX 2012 Data Import/Export Framework" as replacement of Data Migration Framework. Please check details at Technet.

Resolution: To change/update search name once data is inserted using DMF, you need to import following two fields in your CSV file and run the import process again. Below are field names:

1. SEARCHNAME
2. NAMEALIAS

Note: If values are changed only in SearchName field and not in Namealias then Search Name won't be changed in items list, so always change values in both columns and import data again in system, don't use staging to target operation but the complete process of Get staging data and Copy Data to Target needs to be run to take changes place.

Problem: How to see error log in Data Migration Framework (DMF)

Resolution: Error: For additional warnings or errors, please check the log

To identify the above error, click on Log Button for more details, system will display details in an error text box, see below screenshot:

Click on Log button and another screen will open with error detail, see below screenshot:


Problem: Joins between the Staging and Target tables do not get created

Resolution: Open Processing Groups Screen, select the Processing group->Open the Target Entities and change to Details View, you can simply press the "Generate"-button over the grid to regenerate the mappings. The toolbar is only enabled/visible from the details view.

Refer to following Dynamics community discussion for full problem & its resolution

https://community.dynamics.com/product/ax/f/33/t/96289.aspx 


Error: Install-AXModel : The pipeline has been stopped. At line:1 char:16 + Install-AXModel <<<<  -File "C:\Program Files\Microsoft Dynamics AX 2012 Data  Migration Framework Client Components (Beta)\DataMigrationFramework.axmodel"     + CategoryInfo          : OperationStopped: (:) [Install-AXModel], Pipelin    eStoppedException     + FullyQualifiedErrorId : One or more conflicting model elements already e    xists in an     installed model.,Microsoft.Dynamics.AX.Framework.Tools.ModelManagement.Pow    erShell.InstallAXModelCommand


Resolution:  This problem comes because of conflict in model import, refer to TechNet topic How to: Export and Import a Model [AX 2012] or use the -Conflict Push option at the end of the command to import model file.

Below is full command in case of above error to import model file: 

 Install-AXModel -File "C:\Program Files\Microsoft Dynamics AX 2012 Data Migration Framework Client Components(Beta)\DataMigrationFramework.axmodel" -Conflict Push

For distributed environment e.g. if SSIS is on different computer and AOS is on different computer then /db switch is required to be executed with Install-AXModel Command below is syntax with AXUtill. To execute axutil import command go to the ManagementUtilities directory and use the command, below is full illustration of command.

Default directory for ManagementUtility C:\Program Files\Microsoft Dynamics AX\60\ManagementUtilities>

axutil import /file:"C:\Program Files\Microsoft Dynamics AX 2012 Data Migration Framework Client C
omponents (Beta)\DataMigrationFramework.axmodel" -conflict:push /db:ax2012 /s:axserver


Error: Error executing code: DMFParameters (table) has no valid runable code in method 'validateSharedFolderPath'.

Stack trace

(C)\Data Dictionary\Tables\DMFParameters\Methods\validateSharedFolderPath
(C)\Forms\DMFParameters\Designs\DesignList\ValidateSharedFolderPath\Methods\Clicked - line 11

Resolution: This error occurs if you try to use Data Migration Framework on a computer on which DMF is not installed. Try using on a system have proper installation of DMF, system will work properly.

________________________________________________________________________________
Data Migration Framework: Beta Version
Document Version: 1.0
email: mansoor_adeel@yahoo.com
           mansoor_adeel@hotmail.com  

skype: mansoor_adeel

Monday 10 December 2012

Microsoft Dynamics AX 2012 How to create custome CSV file for products import using Data Migration Framework (MDF). Dynamics AX 2012 How to import items master data using Data Migration Framework

Note: Microsoft has launched new enhanced framework named "Microsoft Dynamics AX 2012 Data Import/Export Framework" as replacement of Data Migration Framework. Please check details at Technet.

Purpose: Purpose of this post is to show how to create a new CSV file to use for Products Import using DMF. DMF ships with default template of item to help user as well, but we will see how to create our custom CSV file for items import. The same process is used to prepare custom file for any entity.

Prerequisites: 
1. Data Migration Framework installed and running on the computer
2. Basic understanding of navigating Microsoft Dynamics AX 2012
3. Basic understanding of AX 2012 table fields

Process

1. Navigate to Data Migration Framework->Processing Group

2. Press Ctrl+N or New Button to create new record, provide Group Name, Description. Press Ctrl+S to save the record and Entities button will be enabled, I will use PIF as Name and Product Information System as description. See below screen shot


Select Entity

Select the Processing Group and click Entities button at top, it will show another screen to add entities in processing group. Select Product as entity from entities list and provide the file Source Data Format. I will use CSV as source data format. Refer to section Setup source Data Format section in my post for  Import Customers using Data Migration Framework to see how to create new Source Data Format. As soon as Source Data Format is provided Generate Source File button will be enabled. See below screen shot


 Generate Source File

Now click on Generate Source File button and a wizard will start to create the file, click on Next button, a screen will appear with a list of all products related fields. Details of the columns shown in the screen is as under:

1. Present in Source - If checked, this field will be selected to add in source file
2. Sequence - The sequence in which selected field will be placed in source file, use Up & Down buttons to change the position of field.
3. Field Name - Name of Field 
4. Mandatory - If checked, it means this is a required field to import the line item otherwise an error will be generated by DMF during import
5. Field Type - Describes the type of data required in the field being selected to import
6. Field Size - Maximum length of data, which could be imported

See below screen for field list of items

Now select required fields from the list and  click Generate Sample File. System will create the sample file, save the file at some location and populate data in the file. User can use Microsoft Excel to open the file and save it back in CSV for easy update of data.

Standard Fields to Import


Following are standard fields required for proper posting of Requisitions, Purchase Order, Sales Order, Inventory Posting, requirement may differ user to user. User can do more settings after import or before import of items.

ITEMID - The primary key
DisplayProductNumber - The number which will be displayed in items screen
EcoResProductTranslation_Name - Product Name

NAMEALIAS    -  Product Name
SEARCHNAME - Product Name, its 20 character length (NAMEALIAS, SEARCHNAME both are required to update Search Name column in Items list screen)
 
ITEMGROUPID  - e.g. part, medicine, etc.
InventTableModuleInvent_UnitId  - Unit in Inventory section
InventTableModulePurch_UnitId   - Unit in purchase section
BOMUnitId   - unit in BOM section 
InventTableModuleSales_UnitId   - Unit in sales section
ECORESPRODUCTTRANSLATION_LANGUAGEID   - Language id
PRODUCTSUBTYPE   - sub type of product e.g. product or product master 
PRODUCTTYPE   - item or service
EcoResStorageDimensionGroup_Name  - Storage Dimension Group ID (Required before item can be used in transactions)
EcoResTrackingDimensionGroup_Name - Tracking dimension Group ID (Required before item can be used in transactions)
EcoResProductDimensionGroup_Name   - Product Dimension Group
MODELGROUPID   - Item Model Group
DefaultOrderType   - Default order type e.g. "Purchase Order", this is also required to display items in some screens
PurchModel    -  This is "Yes/No" enum, use this to display last purchase price displayed by default in Purchase Order line item
InventTableModulePurch_OverDeliveryPct  - Over delivery %age for purchase order delivery
InventTableModulePurch_UnderDeliveryPct - Under delivery %age for purchase order delivery
CostModel - use if want to use Latest Cost Price parameter in items screen

How to Identify Field Name to import using AX form

If field name are not known, then its simple to see the field name from released products screen, I will describe how to see name of a field on Product Screen. Navigate to Product information system->Common->Released products. Select any of the product from the list and click edit, right click on any of the fields on screen and click Personalize, system will display personalization screen. At personalization screen in Properties section there is System Name section in which field name is written. 

See process to identify field name Description in General Tab of items screen. Click on an item and press edit, expand General area->Right Click on Description field and click Personalize, see below screenshot. 


It will open the personalize screen, see where field name is displayed:


Now we will see how to search field Description in field list, click on Field Name input box and write Description and click on drop down and select Contains filter, see below screenshot.

System will display the field name in the list, see below screenshot.


Mark the field name and continue your selection of further fields.

To see how to install / import data using Data Migration Framework, refer to my post Import Customers using Data Migration Framework For detailed import process.
_________________________________________________________________________________

Q & A

Update/Change Search Name after upload

To change/update search name once data is inserted, you need to import following two fields in your CSV file and run the import process again. Below are field names:

1. SEARCHNAME
2. NAMEALIAS

Note: If values are changed only in SearchName field and not in Namealias then Search Name won't be changed in items list, so always change values in both columns and import data again in system, don't use staging to target operation but the complete process of Get staging data and Copy Data to Target needs to be run to take changes place.

How to see error log

Error: For additional warnings or errors, please check the log

To identify the above error, click on Log Button for more details, system will display details in an error text box, see below screenshot:
 
Click on Log button and another screen will open with error detail, see below screenshot:


 _________________________________________________________________________________
AX Version Used: AX2012 RTM
Company: CEU
Entity: Products
Data Migration Framework: Beta Version
Document Version: 1.0
email: mansoor_adeel@yahoo.com
           mansoor_adeel@hotmail.com

Wednesday 5 December 2012

Microsoft Dynamics AX 2012 Import Customers using Data Migration Framework

Note: Microsoft has launched new enhanced framework named "Microsoft Dynamics AX 2012 Data Import/Export Framework" as replacement of Data Migration Framework. Please check details at Technet.

Data Migration Framework is an Add-on for Microsoft Dynamics AX 2012, it helps import bulk data in AX using standard UI of Dynamics AX.  Examples of data which can be imported are, Customers, Vendors, Vendor & Customer addresses, BOM, etc.

The Data Migration Framework is available from the InformationSource services download page. DMF supports ODBC, AX Database and File format. See more details at TechNet page for details related to Architecture & File format support.

In this post we will see how to import Customers Master data in AX 2012 using DMF and will see how much simple and useful this Add-on is.

DMF needs to be installed on following computers:

1. Computer running SQL Server Integration Services
2. Computer running AOS
3. Client computer

For more installation details see Install the Data Migration Framework [AX 2012] topic at TechNet. DMF Creates some tables in AOT for staging purpose during installation.

Dont' forget to compile your application and Database Synchronization after installation of DMF, otherwise an error will be generated when you click on any menu item in DMF section.

Architecture, Configurations, Process:

 To view the architecture, configurations and process of DMF/DIXF, please view from following Microsoft document

https://docs.microsoft.com/en-us/dynamicsax-2012/appuser-itpro/data-import-export-framework-user-guide-dixf-dmf

Following default entities are available to import in AX 2012.

- Bill of Material
- Contacts
- Contact Addresses
- Customer
- Customer Addresses
- Dimension
- Employee
- Employee Addresses
- Inventory Journal
- Ledger Balances
- Main Account
- Open Invoices (Accounts Payable)
- Open Invoices (Accounts Receivable)
- Open Sales Orders
- Open Purchase Orders
- Price Discount
- Product
- Project
- Unit of Measure
- Vendor
- Vendor Addresses


Source to Staging:
When data is copied from source to staging a "Processing Group" is required to be associated with entities to run as job. At this stage data is copied from "Source" to "Staging" where user can verify and edit data before finally moving to "Target".

Staging to Target:
After validating data from Staging, user can process Staging to Target to copy data in actual database, system will use same Processing Group created for Source to Staging to process Staging to Target.

Remove Staging Data:
After staging data is copied to target and is verified, it is recommended to remove staging data from system which was kept by the system for user verification. 

Processing 

Setup shared directory

An important first configuration is to provide Location of Shared Directory. Click Data Migration Framework->Setup->Data migration framework parameters. Provide the path to a shared directory and click Validate to let system verify the path. This directory will be used by DMF to put some files for internal use. User configuring the shared directory path must have Read/Write permission on the directory.


Setup source Data Format


Click on "Data Migration Framework" click on Setup->Source Data Formats->Click New to create new record to prepare Source Format 


Give Source Name e.g. CSV in Description column write Comma Separated File, in Type column select File, then assign the additional details about the data source in right pane of Source Data Format Screen.

Fill following sections on right pane:

File Section

1. File format-provide file format here Delimited or Fixed Width, we will choose Delimited for our example
2. First Row Header check box- check this check box if first row is a header for remaining records
3. Row Delimiter-Select this if your file contains multiple rows. Here user can select "CR,LF,Semicolon {;},Colon {:},etc." we will select {CR}{LF} for our example. 

4. Column Delimiter-Select this if your file contains multiple columns to import, this is used to distinguish values between column, there are multiple options available to distinguish we will use Comma for our example.
5. Text Qualifier- Select this if your column type is string and you have to use Delimiter in data e.g. your Delimiter is Comma and you have to use it as data e.g. "2-A Ahmed Block, New Garden Town" here you have to write the comma in double quotes "," so that system don't consider it as Column Delimiter. For our example we will write " as Text Qualifier.


Regional Settings

1. Code Page - Character encoding for the file, there are different options available select your desired one, for our example we will select Western European (Windows) 
2. Unicode - Select this if your file is using Unicode, we will not use this option for our example
3. Language Local - Select Language, we will use en-us for our example


Multiple value separator

1. Role Separator - This is used to display multiple values in a column e.g. if a customer have multiple email addresses. We will use semi column for our example.


Now General Settings are finished, screen should look like this

 Next important thing is Application related details, click on Application to do settings, following settings will be don here:

Dimensions 

Dimension Code - Select which financial dimensions you want to import, we will choose Department;CostCenter;ExpensePurpose for our example.

Chart of Accounts Delimiter - Select this to specify in which format Dimensions will be available in file, we will use "-" it means we will enter data in following format Department-CostCenter-ExpensePurpose.

Name Sequence - Select what would be the default sequence for migration of party records i.e. First Name, Last Name or any of the combinations given in the list. We will use "First Middle Last" for our example.

The screen should look like below after above settings


Next step is to identify identities to import into AX 2012, now click on Setup->Target entities. A list of all entities will appear. User can create his own entity as well which will be discussed in another post, here we will go on with standard entities. Below is list of default entities available in system, which were discussed in the beginning of the post:


Create Processing Group

Next step is to create Processing Group. Processing Group is similar to Definition Groups in AX 2012. Go to Common->Processing Group. Click New give name & description, write "AR" in Name and "Accounts Receivable" in description column. Press Save and Entities button will be enabled.


Click on Entities button to select entities to import, click on New a blank line will appear, fill in following columns:

1. Entity Name - Select an entity name from the list to import, we will use Customer for our example
2. Source Data Format - Select the source file format to import, we will use our previously created file format, select CSV from drop down
3. Sample File Path - Give path of the file containing data.
You can see sample files which are shipped with the DMF at <your installation drive\Program Files\Microsoft Dynamics AX 2012 Data Migration Framework Client Components (Beta)\DemoFiles\Delimited\> folder.We will use "CustomerEntity_ContactInfo" file for our example. Now the screen should look like this:


See a list of demo files with details of entities shipped with DMF at TechNet.

Generate Source Mapping


Click on Generate Source Mapping on entities screen, system will verify the source file columns with staging table columns, if any error is present in the file, system will show the error. There is another section Modify Source Mapping, use this to modify mapping between the fields, user can remove an existing mapping and can create new mapping as well. To remove existing mapping right click on desired link and click Delete Selected Node. To create new link drag the desired field from source to target, it will create a link between the fields.

Preview Source Data

Click on Preview Source file on entities screen, system will display data in preview grid for user checking. See Preview section on above screen shot with data populated in grid. Close the screen and go back to processing group screen to process further.

Get Staging Data

Click on Common->Processing Group, select the previously created group click Get Staging Data, system will ask for JobID to create a Job for running Staging Data routine. Provide an appropriate ID, Description and click "OK". See screen shot below:

System will show another screen with job created in it, in that screen user can click on Preview to verify data again. Click on Run button to run the job to prepare staging data. A screen will appear where user can schedule a re-occurrence batch job to run the job and press OK to run the job instantly. see below screen shot of Staging Data Preparation main screen.


A success message will appear '6' Customer record(s) inserted in staging as I am importing 6 records in the file. See below screenshot.


View Execution History

 User can view execution history of staging data processing using Processing Group screen. Click on Common->Processing Group select the appropriate processing group and Click Execution History, a screen will appear showing all executed jobs. Select a job from the previously executed jobs to see execution details. A selection of JobID is also available for filtration of jobs as well. See below screen shot.


An important thing on this screen is, user can see Staging Data and even user can edit data before processing to Target. To view or edit the staging data, select the appropriate JobID and click View Staging Data. A screen will appear with all data copied from Source to Staging. See below screen shot.


On this screen user can edit and validate data before processing for Staging to Target. Do changes if required otherwise close the screen. Now user can copy data from staging to target. User can copy data from staging to target from Execution History or Processing Group screens. Click on Copy Data to target button, system will ask for the job to run, select the your desired JobID and click OK. See below screenshot.
Another screen will appear from where user can run the job. Click on Run to start staging to target data copy process. System will again prompt for making a re-occurrence job, do the re-occurrence settings or click OK to process the job.


An information box will appear indicating Data written to target ('6' records created, '0' records updated) as I was importing 6 records, 6 is representing the number of records user is importing.
__________________________________________________________________________________


AX Version Used: AX2012 RTM
Company: CEU
Data: Demo Data
Data Migration Framework: Beta Version
Document Version: 1.0
email: mansoor_adeel@yahoo.com
           mansoor_adeel@hotmail.com